1. Click on the Create/Send tab and click Create E-mail.
2. Choose Use a template, select a template and click Continue.
3. Start using the Editor
Now you can start editing the content of your message, such as its titles, body text, images, links and so on. Add your text by either typing directly into the editor or copy and paste from a text document. If you paste formatted text (for example from Word), remove the formatting when pasting in the text by clicking the Paste as Plain Text symbol in the toolbar.

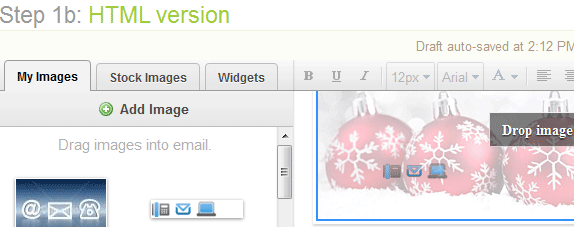
Insert an image
If your image isn’t present next to your message you need to upload it first.
1. Click Add Image and browse to the image on your PC. Select your image and press OK.
2. Click the image in the editor and hold the mouse button down.
Any image boxes will show a message indicating that you can insert your image there.
3. Drag the image to the message.
Any place an image can be inserted will display a message indicating this when you drag the image over it.
4. Let go of the mouse button to insert the image.
It may take a moment for the editor to insert the image. Once inserted you will see the image in your newsletter.


Create a link
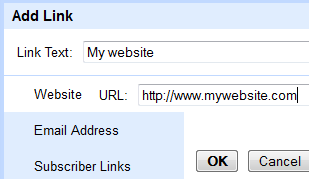
1. Type in the text you want to link and highlight it.
2. Click Link in the toolbar.
3. Add the web address in the URL field.
Make sure to include the ”http://” in the URL. Then press OK.

Add/remove content blocks
When you move your mouse cursor over a content block, a pair of buttons will appear near the top of the content box. The “+” will add a block and the “-” will remove the block.
Adding a block will create a copy of the content block underneath the existing one.
NOTE! Deleting the last content block in a section of the e-mail will cause a warning to come up. This is because removing the last content block can create situations where you won’t be able to add content. We advise not doing this unless you are certain.
4. Don’t forget to Save and Preview your e-mail while working on it!
You click Save and Preview in the top right corner of the editor.
